Today, we have a guest author joining us - is the "cinematic look" an almost overused concept or a captivating subject? Michael Heidecker describes how he achieves his unique look using anamorphic lenses.
A few years ago, I was sitting in a movie theater. For those who might not recall, "movie theater" is a venue where individuals collectively view moving images on large screens. Images that are larger than the ones you see on your home television. Consequently, some images carry a more potent impact than if you were viewing them solely on a TV or computer monitor at home. I can't quite remember the specific film, but the landscape shots were monumental. As I mentioned, the film itself held little significance, but it prompted me to contemplate what made those landscape shots so distinct, so different, so inherently "cinematic". By that point, I had accumulated many years of experience in analog photography, spanning formats from 35mm to large format, and I had also amassed several years of involvement in digital photography. Black and white and color - yet, my images looked unlike those on the big screen. Some were good, some not as much, but none possessed that particular "look". That confounded, alluringly enigmatic "cinematic look".

the journey begins
I began delving into the matter. Firstly, cinema thrives on various formats. Of course, it's always in landscape orientation, but customers of today's streaming services understand well that there are diverse landscape formats. While traditional photography tends to adhere to terms like 2:3 or 3:4, there have been deviations in transitioning to the digital realm. Monitor aspect ratios no longer follow these "old, analog ratios", and even for DVDs and streaming services, new aspect ratios were introduced, often aligning with cinema. Additionally, many digital cameras permit artificial cropping or altering of formats. Cropping to, for instance, 16:9 looked much more "cinematic". Thus, I played around with cropping and formats, primarily 16:9, finding it somehow appealing for certain landscape shots. However, like many other effects, I eventually set it aside, and the matter slipped into a comfortable slumber.
Naturally, the altered format was a "fake". It merely superficially approached this look – and essentially, it was worse, as since I typically shoot in RAW, the sensor had indeed captured the full sensor format and "merely" overlaid a mask. So, more was required. As is sometimes the case, things need time to mature and ferment to achieve a certain impact. One evening, the unfathomable and never-ending source of all wisdom, YouTube, unexpectedly presented me with a short video where a filmmaker pondered the "cinematic look". And instantly, the topic returned to my mind. He mentioned filters he had used, but above all, he talked about "anamorphic techniques" he had employed. Now, for as long as I can remember, I have been a "still image creator" and not a filmmaker, but the topic had seized me. I knew that anamorphic techniques had something to do with specific lenses. And distortions. But for still image creators, it was irrelevant. Yet, I was captivated, and now I wanted to know the details.
Down the Rabbit Hole
Without delving too deeply into the physics, anamorphic lenses employ segments of cylindrical glass to create a horizontal squeeze in the image. This results in an impression in the raw image data that elements are being "stretched upwards". A normal head turns into an egg-shaped head. A round light source becomes an elongated egg. During post-processing, the aspect ratios need to be readjusted; the egg-shaped head becomes presentable again, while blurred light sources, however, retain their characteristic "egg-like" appearance, albeit not as extreme as before post-processing. The end result is an image that is significantly wider in relation to its height, lending it a more cinematic appearance.
However, the challenge with this recording technique is that the market for these lenses is relatively small, and it's only in the last two or three years that it has adjusted to a level that doesn't necessitate mortgaging one's house. In reality, there are four ways to acquire an anamorphic shooting setup. Firstly, one can approach established manufacturers of cinema equipment like Arri, Zeiss, Cooke, Angénieux, and so on. Not all major lens manufacturers for movie cameras offer anamorphic lenses. But when they do, they generally come with price tags that are significantly in the five to six-figure range, or they can be rented on a daily basis. Apart from the price, the next challenge would be connecting these lenses to the camera. If you happen to have won the lottery, tackled the connectivity issue, then you'd possess a solution that could scarcely be termed "portable" for photography, as these lenses are not only large but also incredibly heavy. Well, at least you'd save money on the gym.
So, secondly: DIY. A bit of rummaging through the unfathomable and never-ending source of all wisdom, YouTube, might lead you to construction guides for anamorphic lenses by filmmakers. These often work by marrying a spherical lens with an anamorphic front element. Frequently, reused anamorphic projection lenses (such as those by ISCO) come into play. If constructing something like this is beyond your capabilities, perhaps because you are as mechanically inept as the author of this article, then this option is off the table. There are companies that do this work, but these solutions often require a substantial dose of idealism and money to truly enjoy working with them as a still image creator.
Thirdly: Anamorphic attachments. I've read that there are "cylindrical lens elements" that can be screwed onto your spherical lens, similar to a close-up lens. I don't know if this solution is effective, and manufacturers in this domain include Sirui, Smallrig, Wolffilms, but there are likely others. In principle, this variant is the ambulant analogue to the solution described under "secondly".
Fourthly: In recent years, some third-party manufacturers have started catering to the amateur and semi-professional filmmaker market with affordable yet high-quality anamorphic lenses. For around 600 euros, you can already enter the realm of serious anamorphic imagery. Leading the way is the manufacturer Sirui, which initially offered a series for Fuji-X, Sony, and M4/3 systems, but has since expanded to a series for full-frame systems (L-Mount, Z-, RF, and E-Mount). Since their market release, I've been using the Sirui 24mm and 50mm for the X-Mount on the Fuji XT-4, and also the 50mm for L-Mount on the Leica SL2, which I prefer because I'm familiar with the Leica world - but that's a matter of personal taste. Gradually, other solutions are entering the market. Laowa, for instance, offers a set of anamorphic lenses in a similar price range, and a tier above, Vazen has made its mark. There are certainly other manufacturers, and I'm confident that gradually more solutions at reasonable prices will be offered.
For photographers, a bit of "cinema jargon": T-Stops and Flares, the currencies.
A brief foray into the realm of filmmaking jargon and what one should know. While in photography, the "F-Stop" (the value of the largest calculated aperture) is the figure that swiftly guides photographers, the currency of cinema lenses is the "T-Stop." This value, in simplified terms, indicates the amount of light reaching the sensor. The distinction is crucial because filmmakers need to maintain consistency in lighting more than photographers, and changing lenses should yield the same lighting consistency. However, for us "still image creators," this isn't truly relevant since the lenses lack a spring-loaded aperture; the camera meters exposure at the working aperture.
In addition to the "T-Stop," the compression ratio on the lenses is usually provided. Consequently, there are varying size ratios during the "de-squeeze," as seen in the image examples here. For instance, the Sirui lenses on the XT4 perform a "squeeze" of 1.33, while the full-frame Sirui on the SL2 utilizes a factor of 1.6. For photographers, this only matters when mixing different formats on the same page, resulting in a distinct height for the same width.
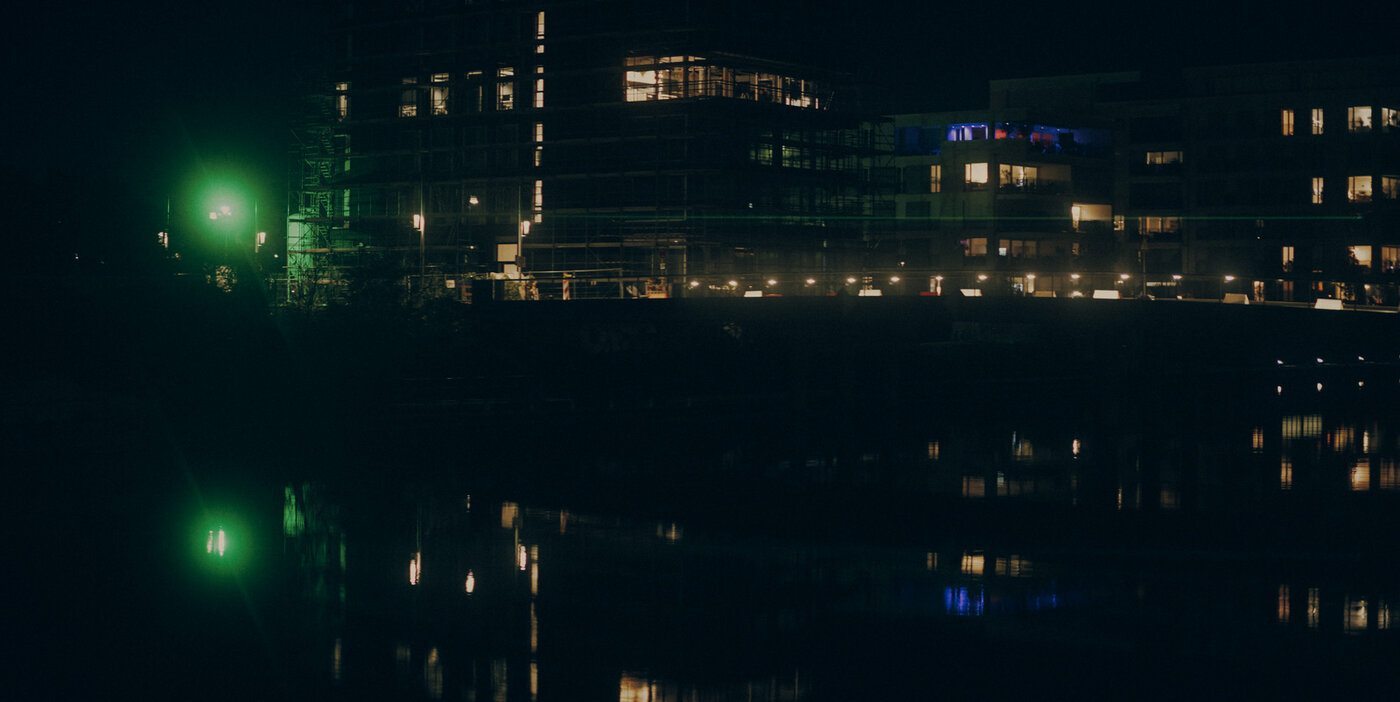
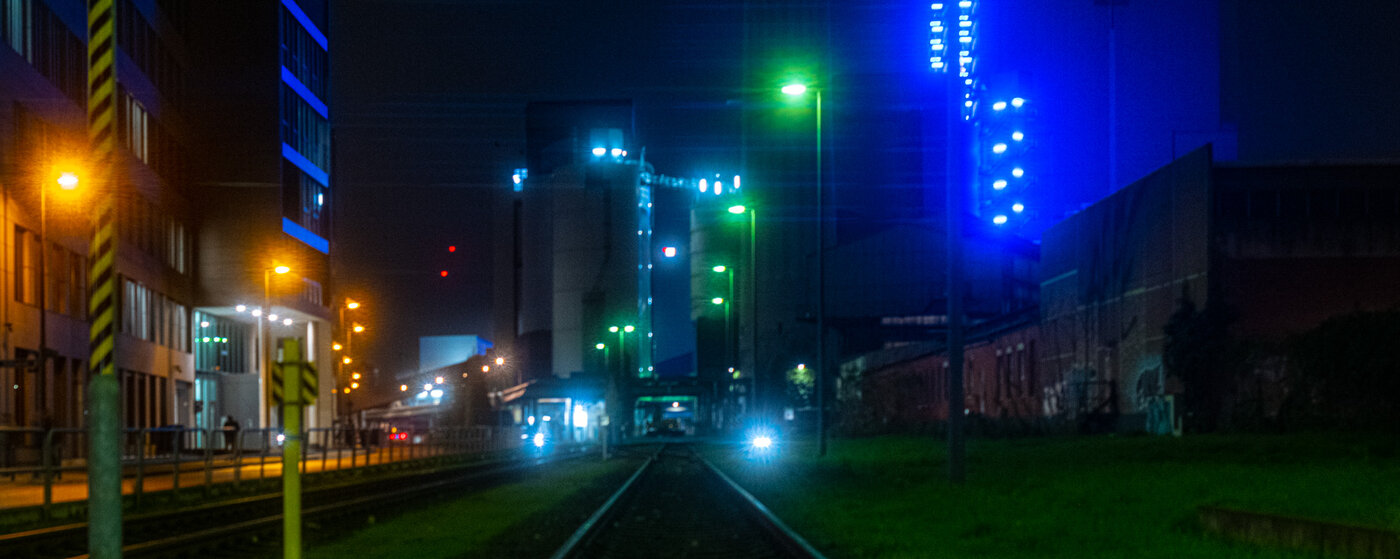
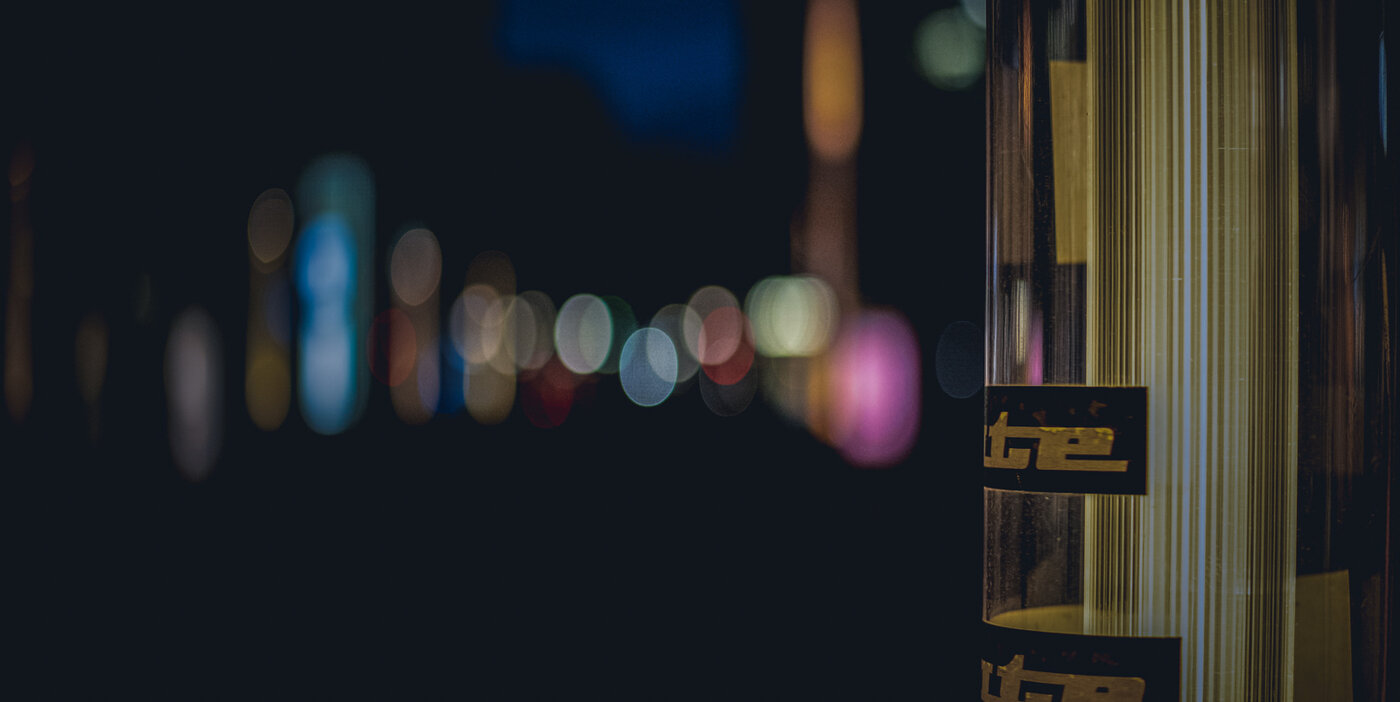
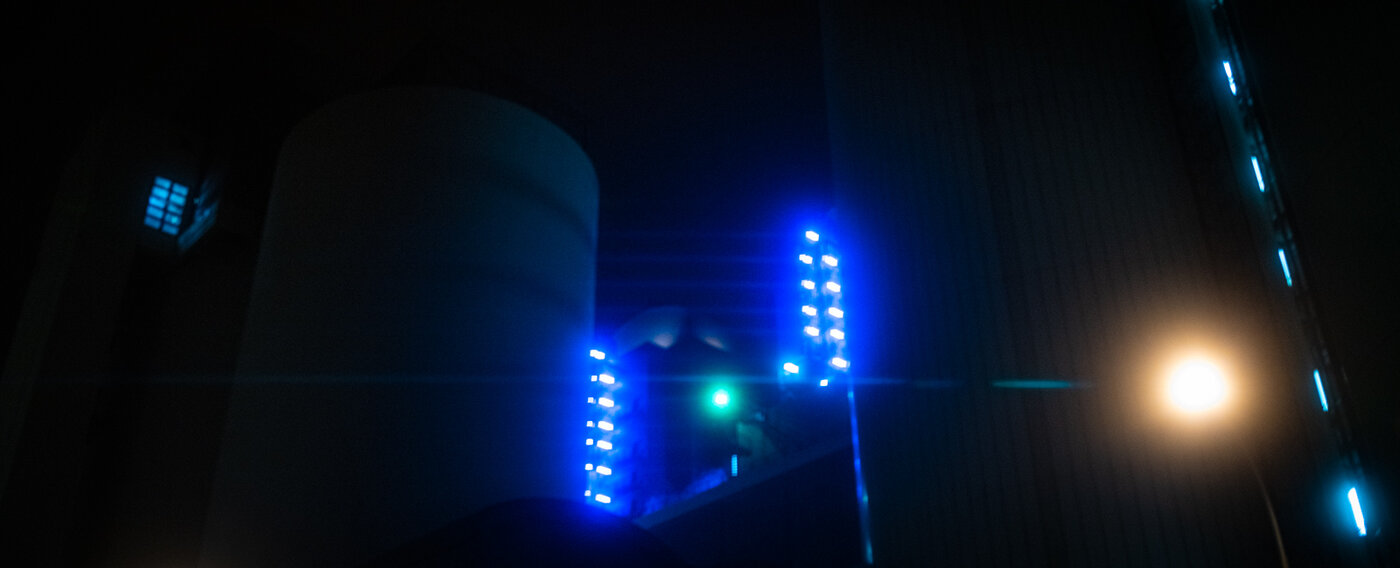
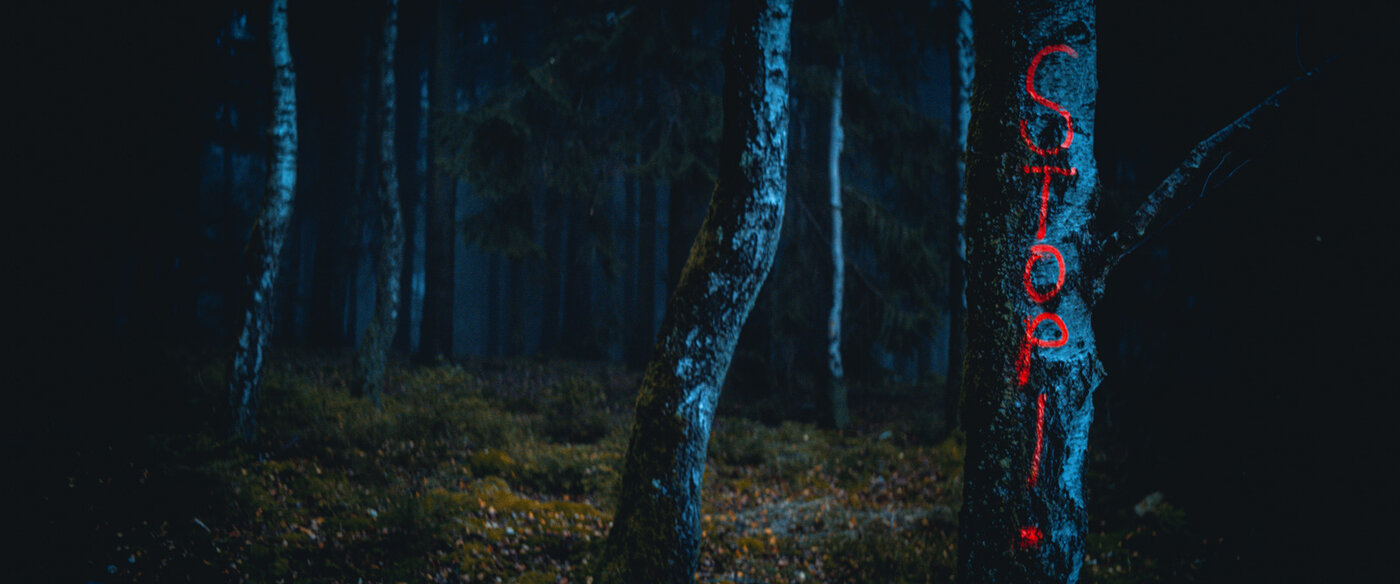
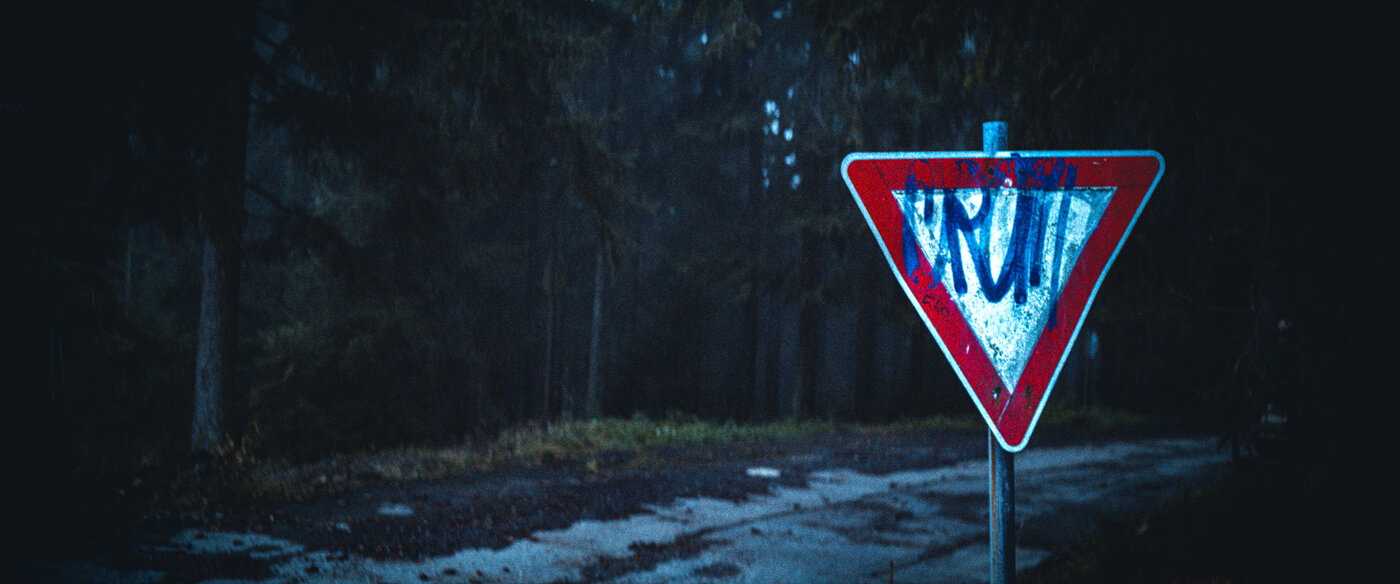
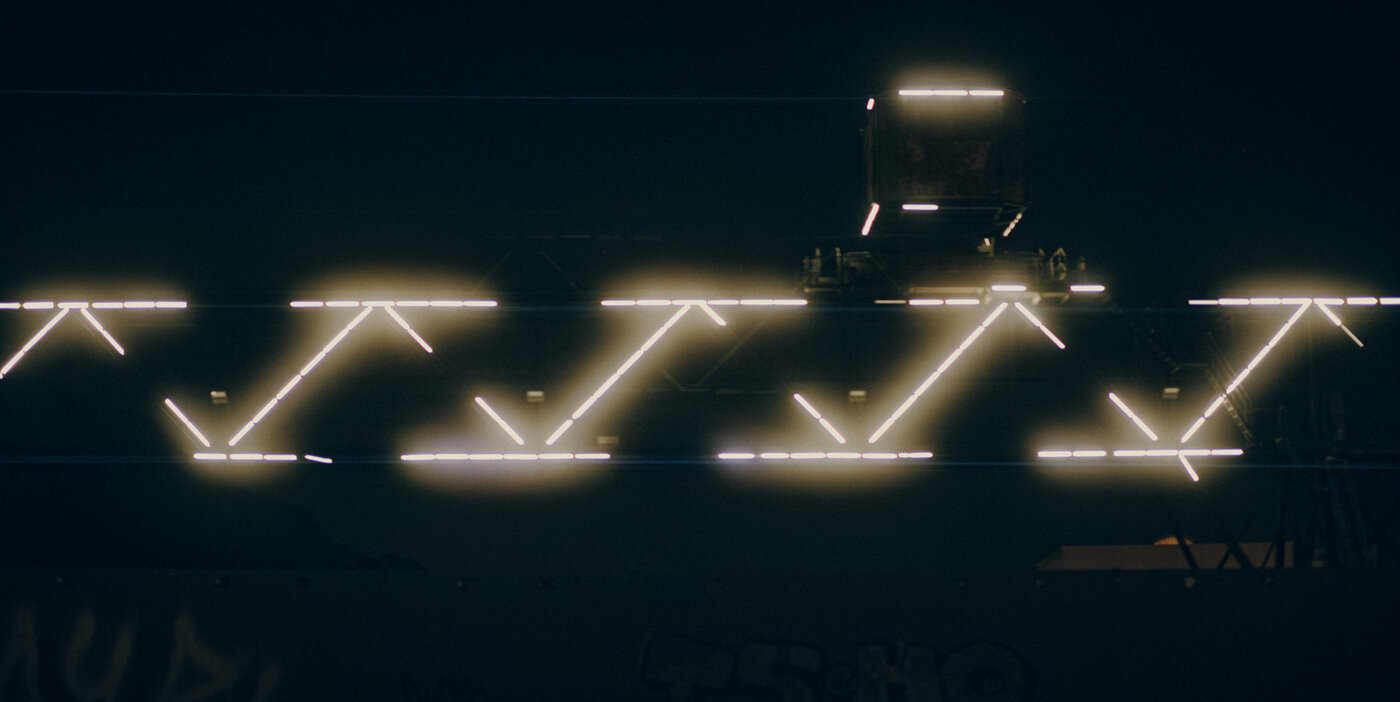
Of course, filmmakers also engage in discussions about bokeh and soft blurs, particularly as film lenses encompass a range of renowned individuals with corresponding price tags. However, the genuine fascination in relation to anamorphic systems is "flare." While photographers can spend hours lamenting flares, ghosts, or reflections, a distinctive characteristic of anamorphic systems is their tendency to produce horizontal light flares that streak across the frame. This isn't a flaw but an intended effect. These effects occur when a light source strikes the lens from the side, and depending on the lens, they can exhibit different colors and move in various directions based on the light source's position. With most lenses (including those by Sirui), these are one or more blue streaks that shoot through the frame, though other colors are possible too. Conversations among flare connoisseurs thus revolve around how prone a lens is to flare, how beautiful the flares appear, and how many flares one can generate. For those wanting to see an extreme portrayal, watch J.J. Abrams' "Star Trek." Ultimately, it's a matter of personal taste, but as with any effect, there's the risk of pursuing the effect for the sake of the effect. But then again, "L'art pour l'art" – art for art's sake.

the interesting part - motifs and setup
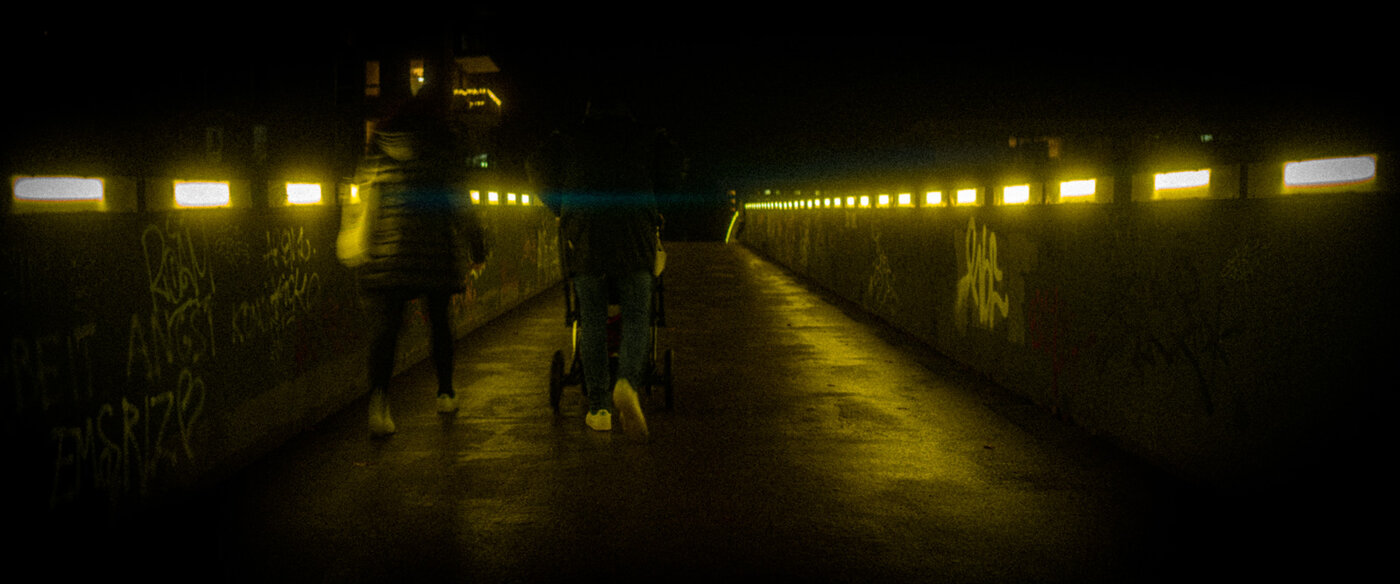
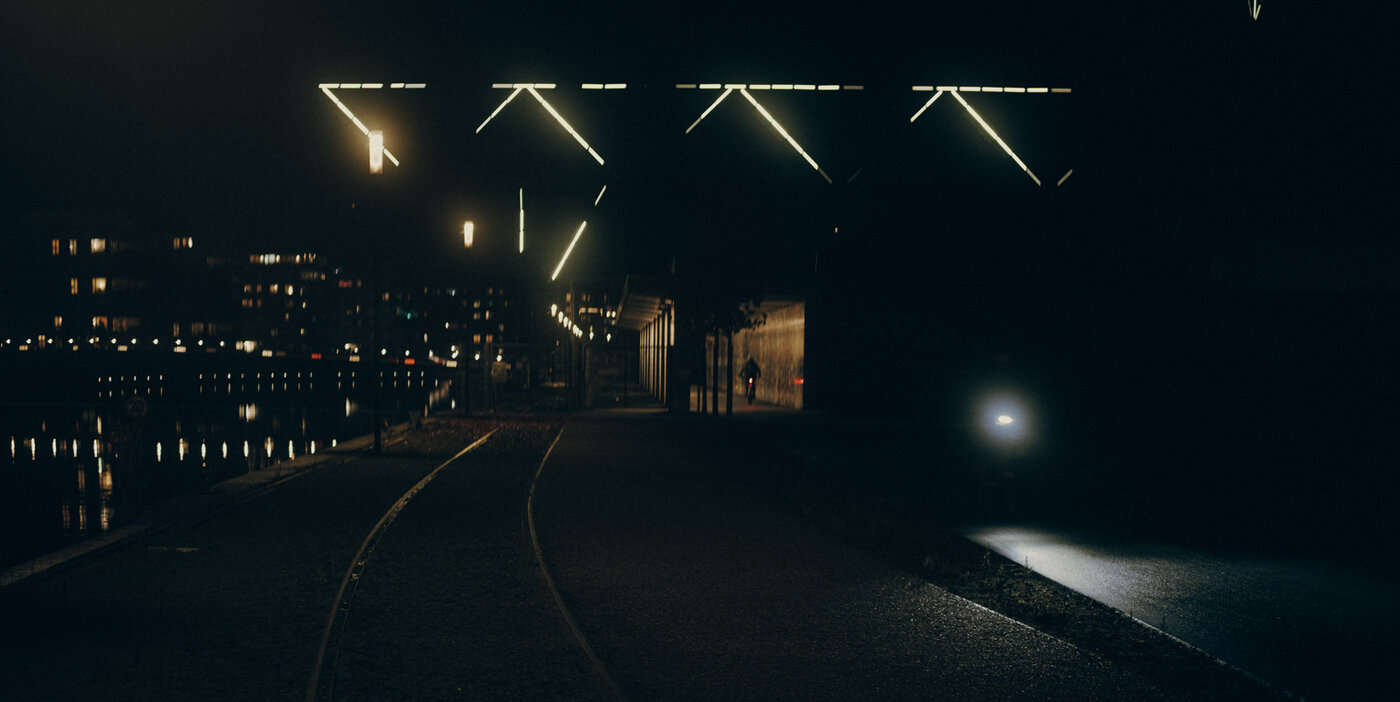
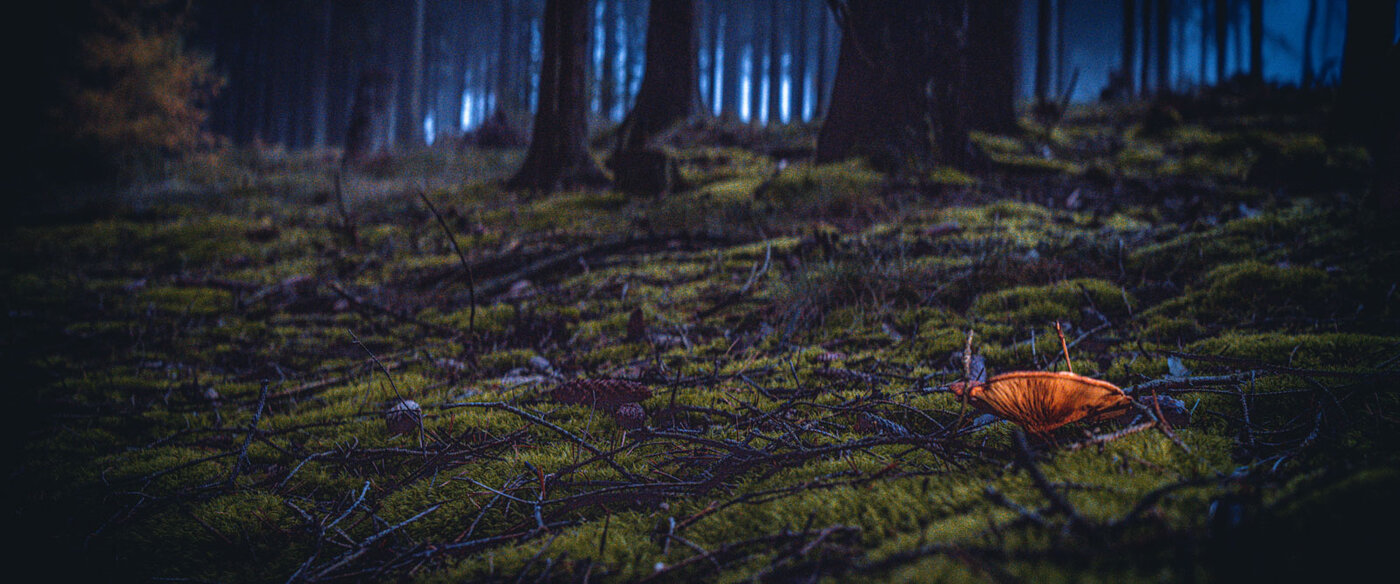
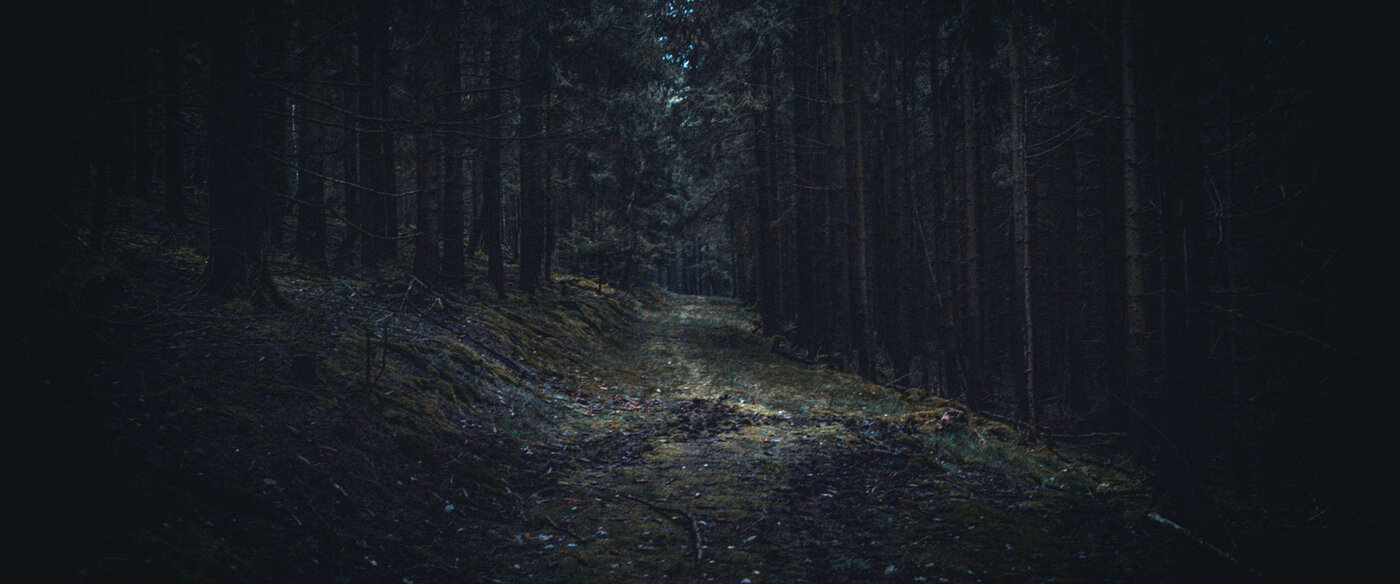
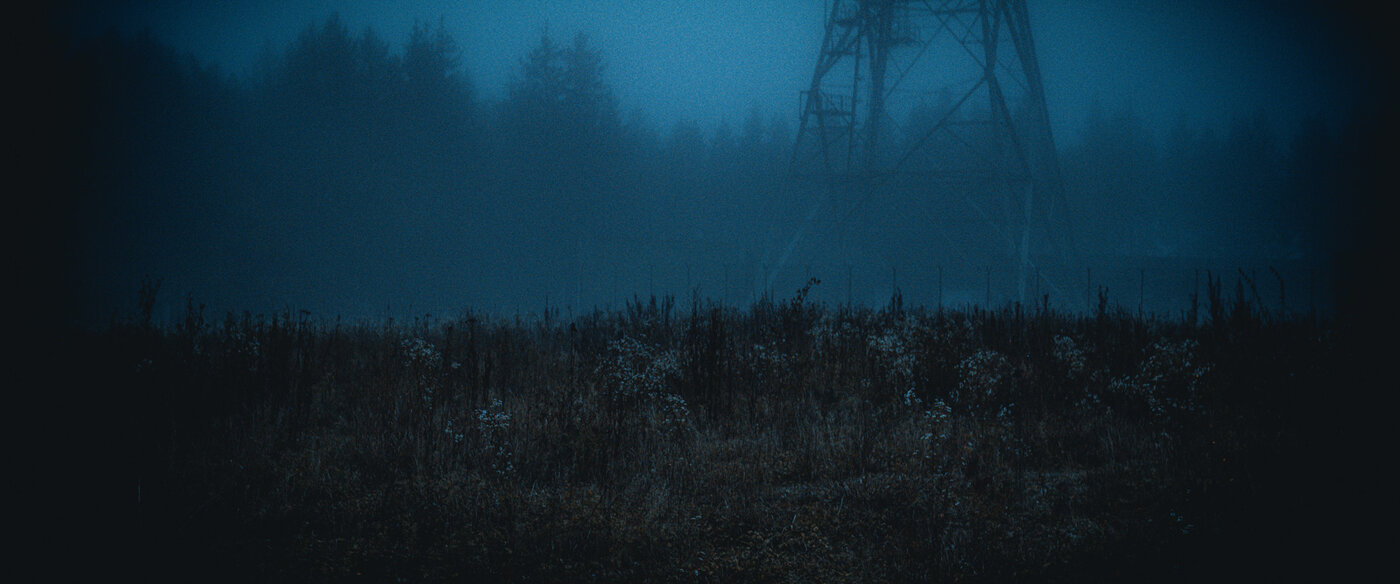
When I embark on an anamorphic photo adventure, I always take exclusively anamorphic equipment with me. This prevents me from taking the easy route and switching back to a spherical lens while on the go. My standard setup typically includes a Leica SL2, the Sirui 50mm T2.9 Anamorphic lens, a lightweight diffusion filter (1/4), and the usual gear one needs. A tripod is very helpful since working with this setup requires precision. I quickly realized that achieving sharp focus is not always easy, and I can only recommend using the camera's electronic aids. As mentioned, manual work is in order; there's no electronic connection between the camera and the lens, and the only mechanical link is the lens release button. Additionally, anamorphic lenses lack spring-loaded apertures. As I often venture into forests and thickets, stopping down can easily make the scene quite dark.
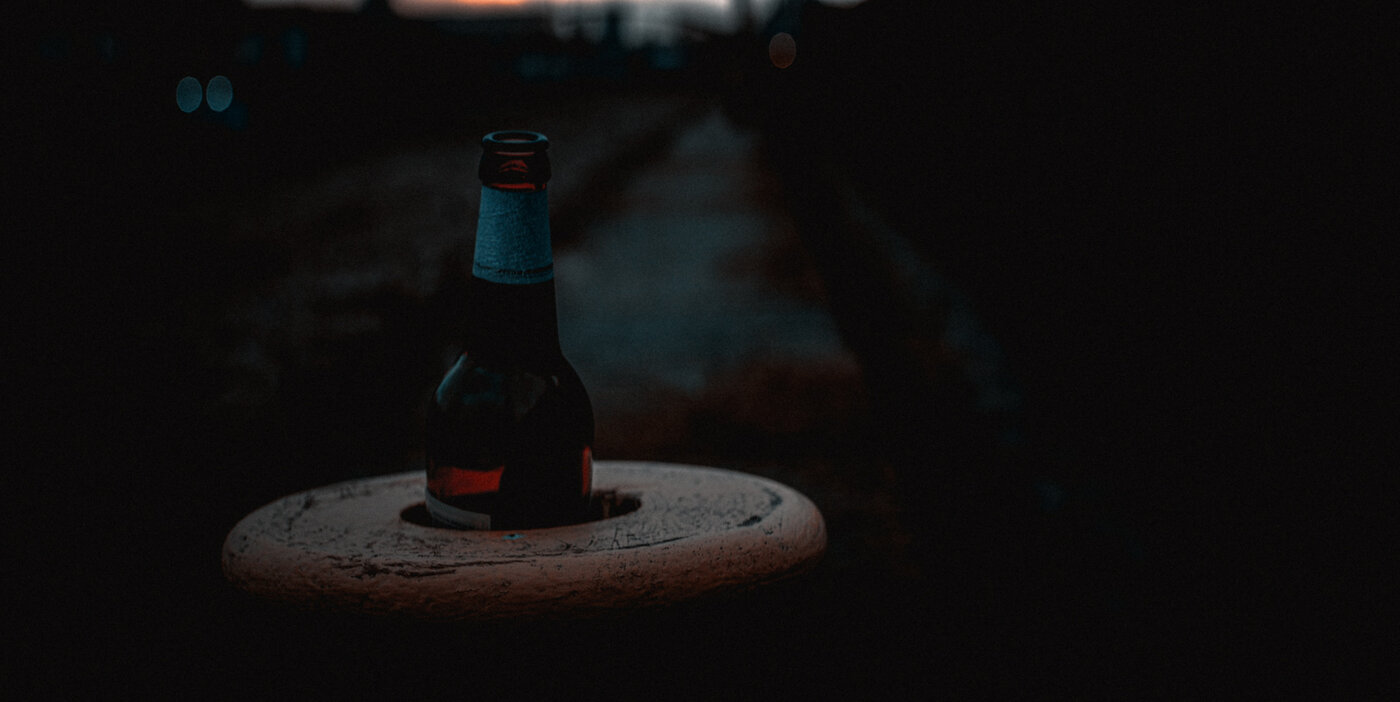
In addition, I usually don't use a flash but prefer to employ LumeCubes 2.0 and corresponding mounts. This allows me not only to have more control over the light but also to introduce flares deliberately.
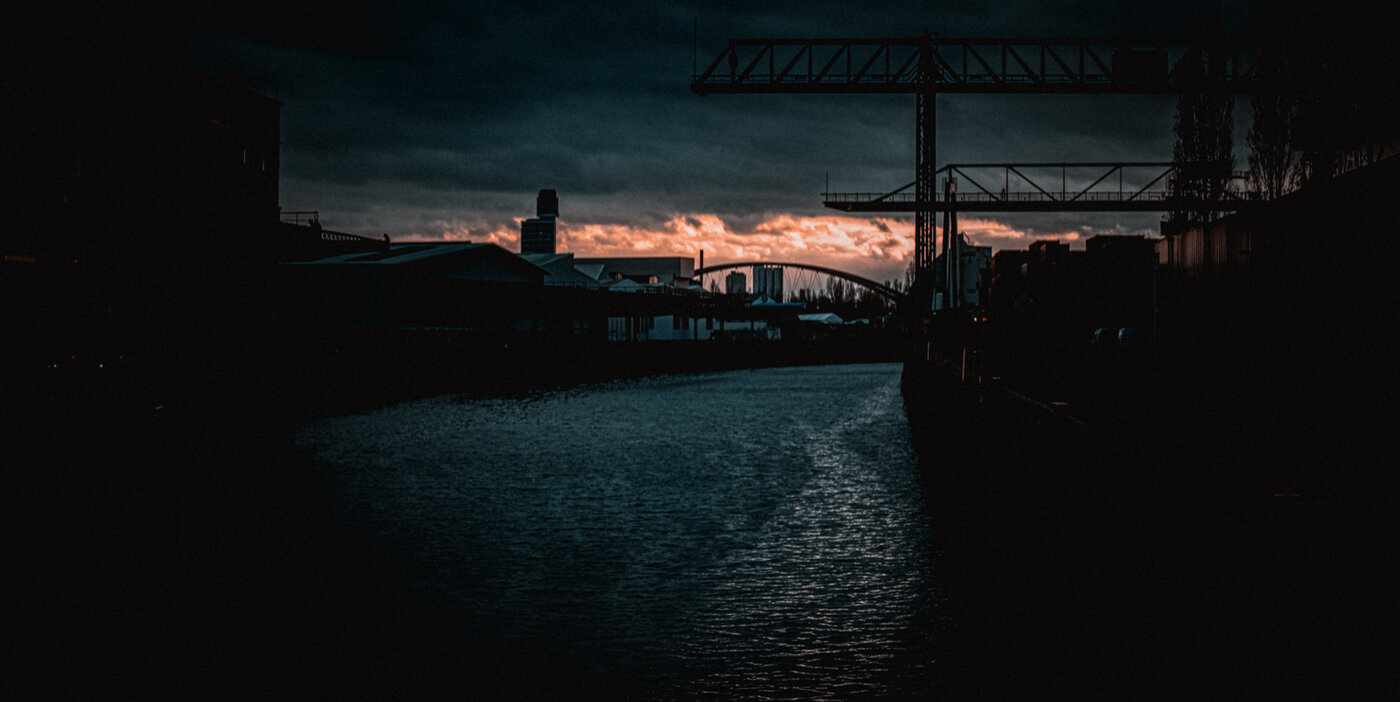
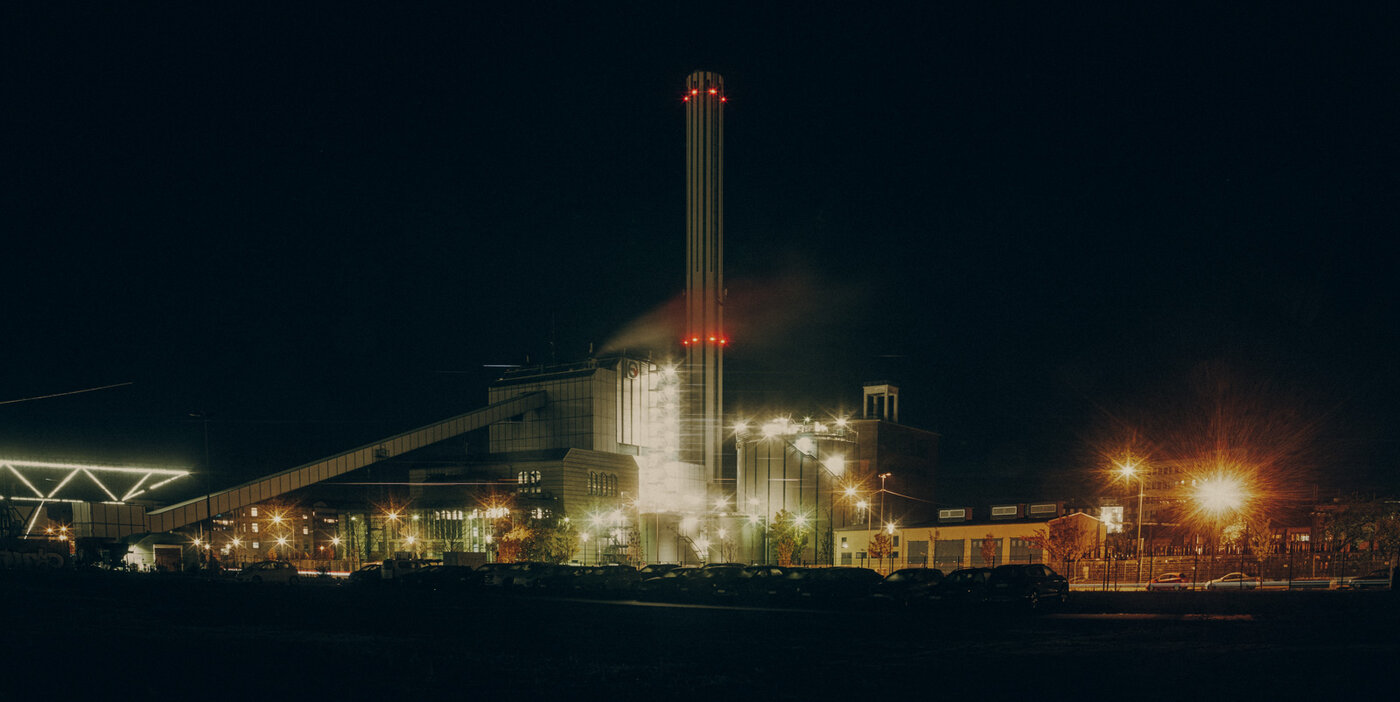
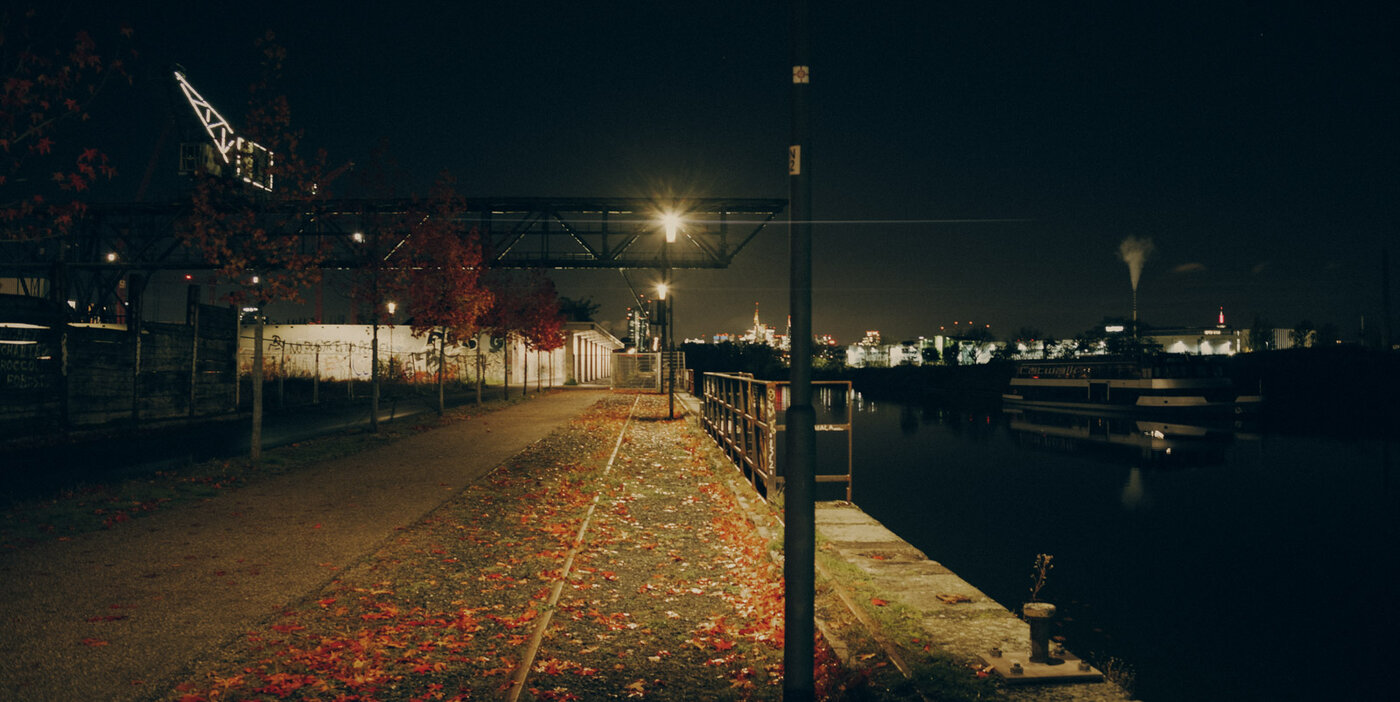
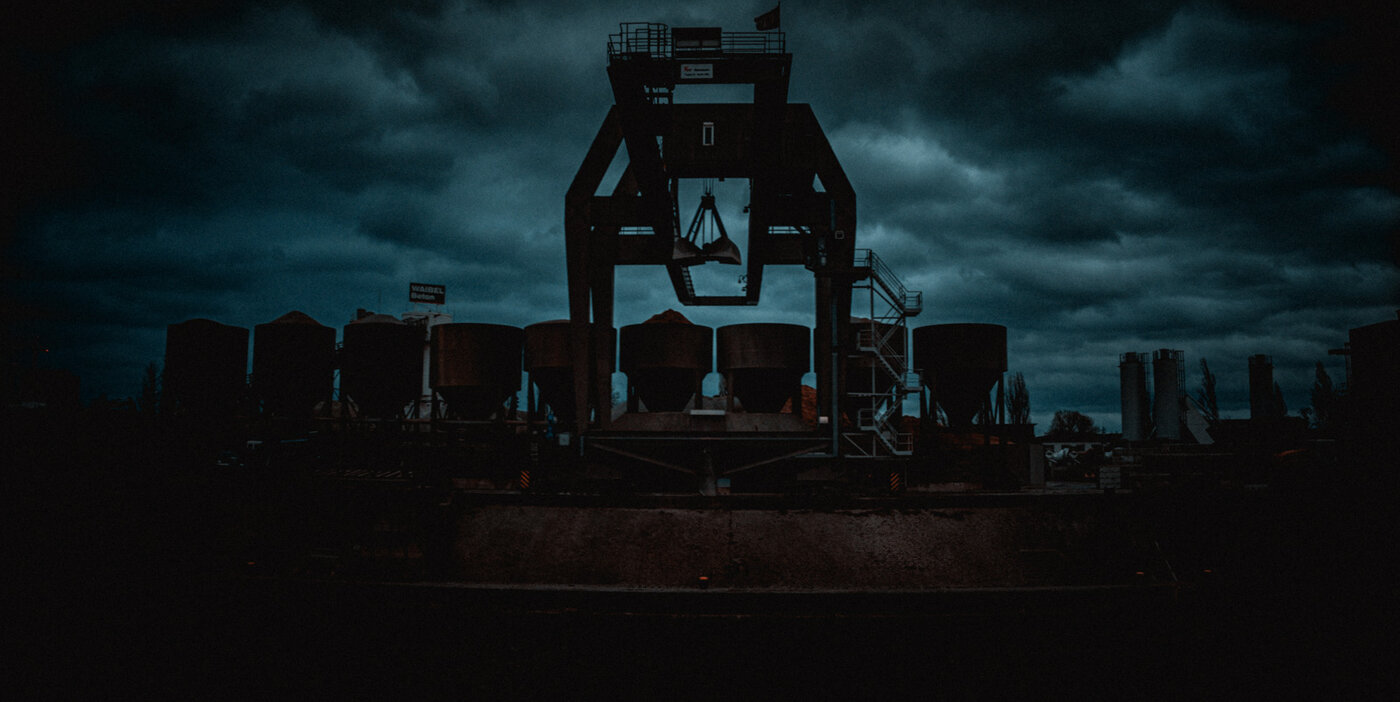
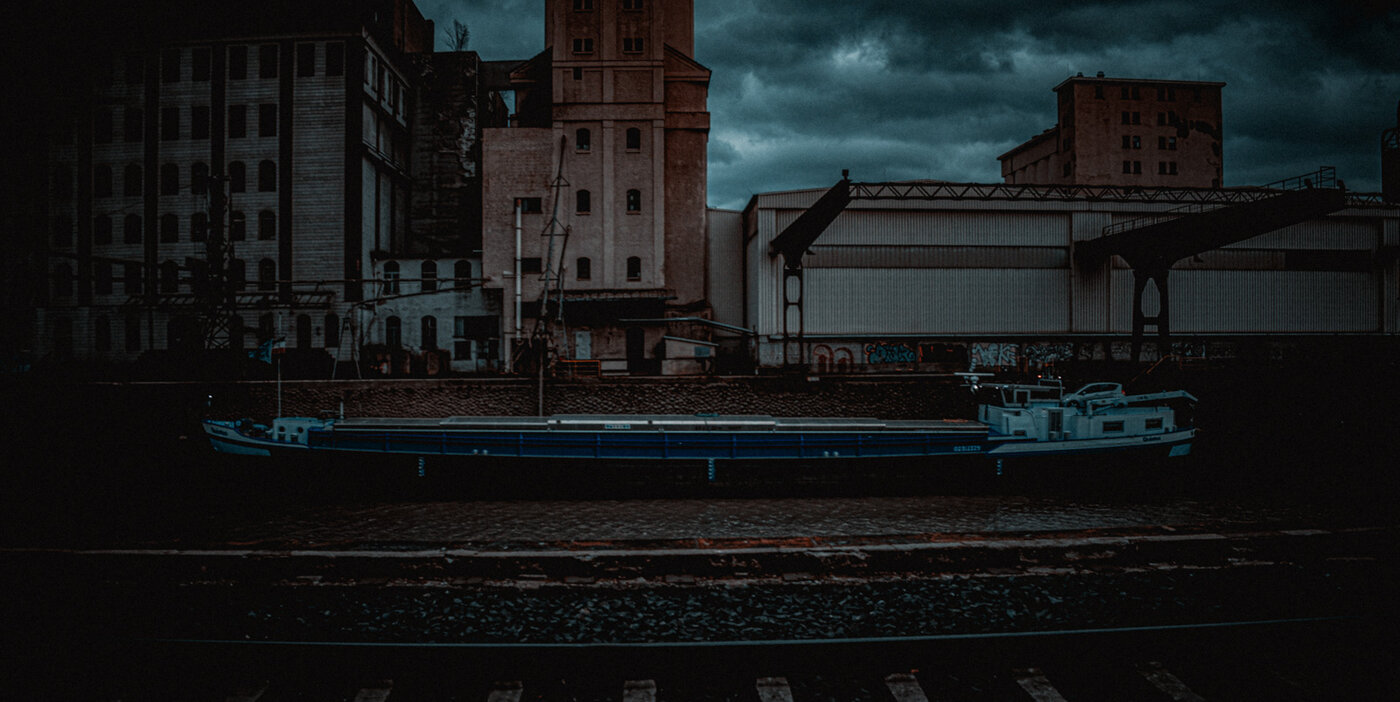
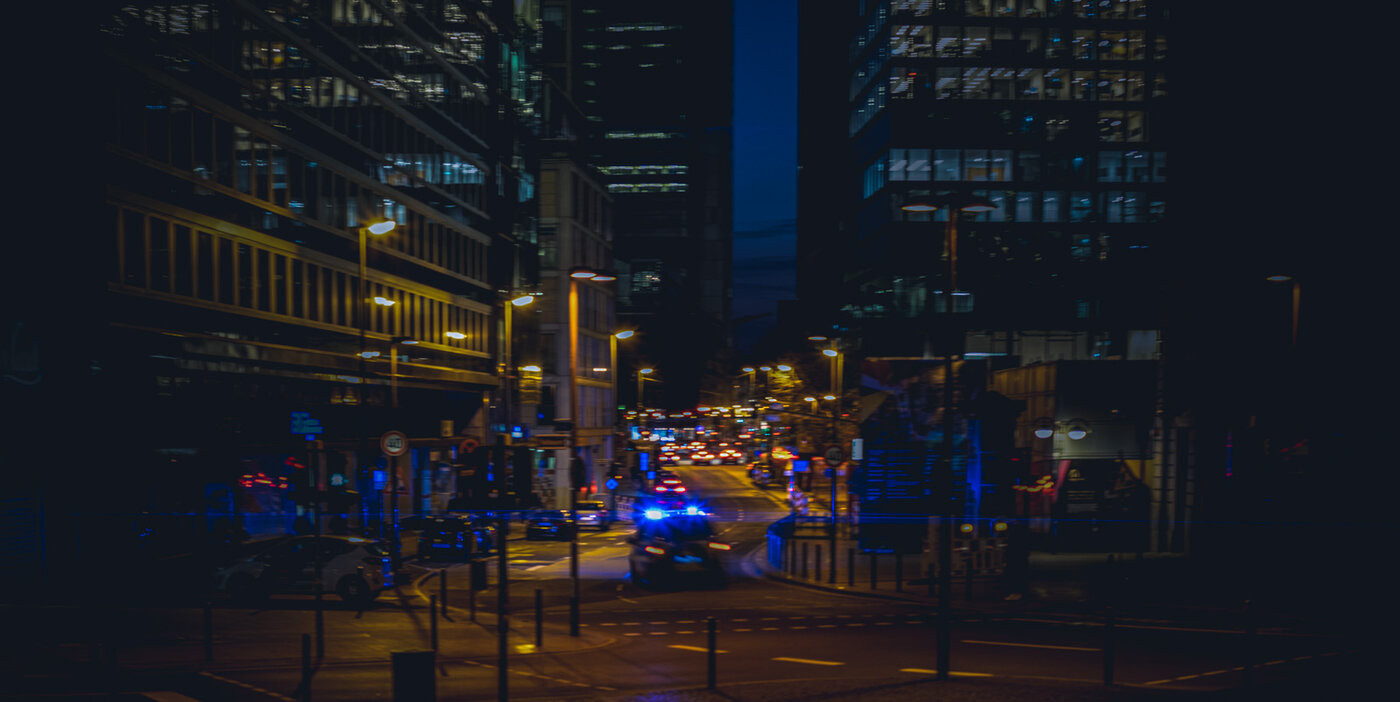
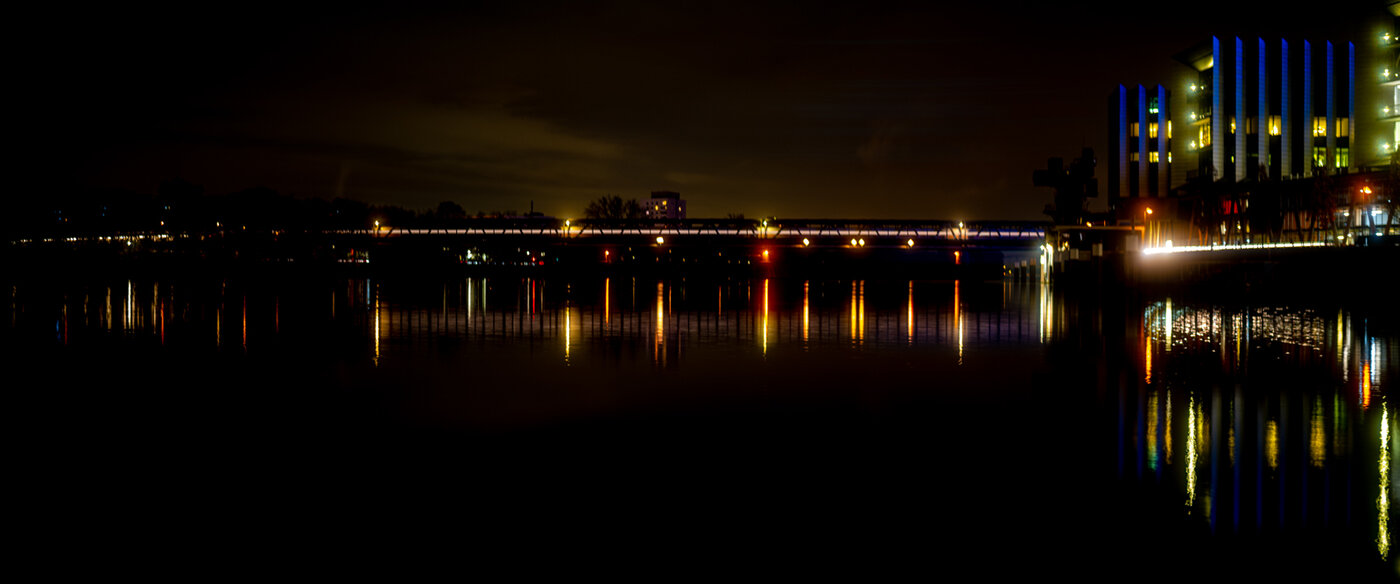
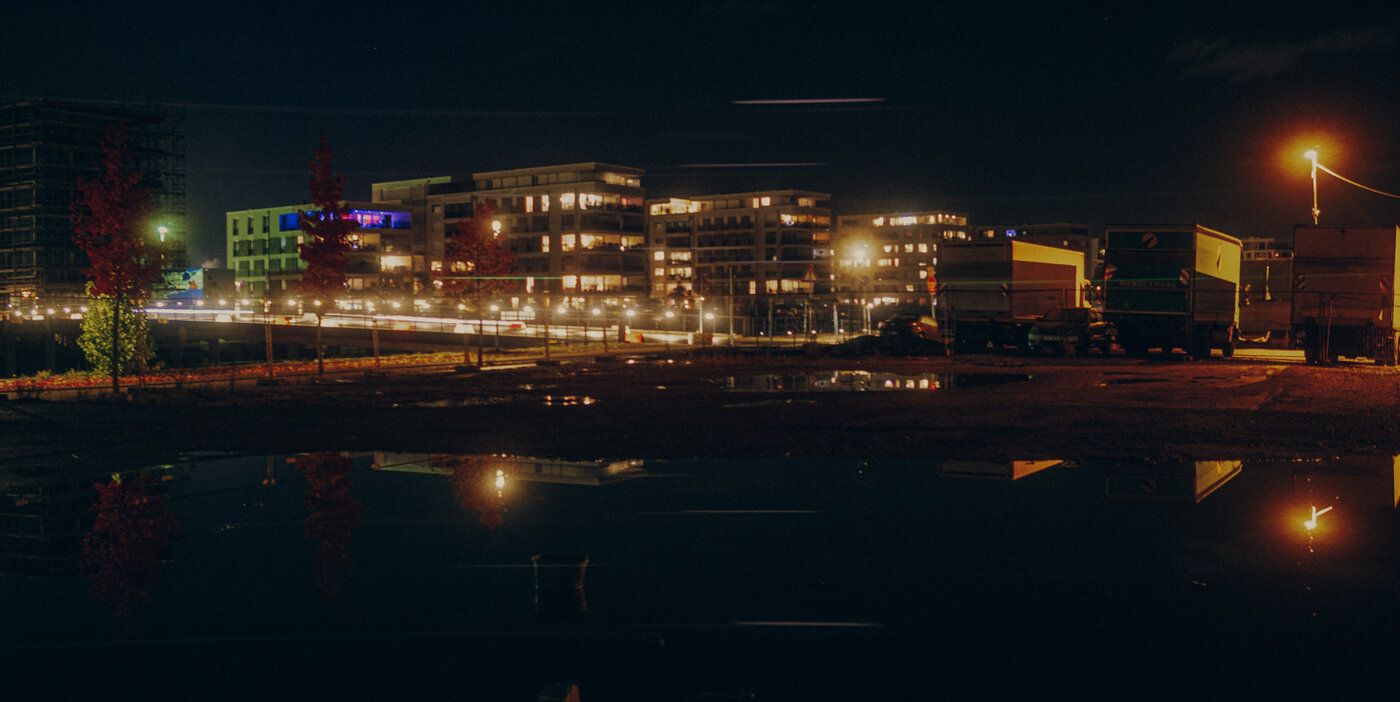
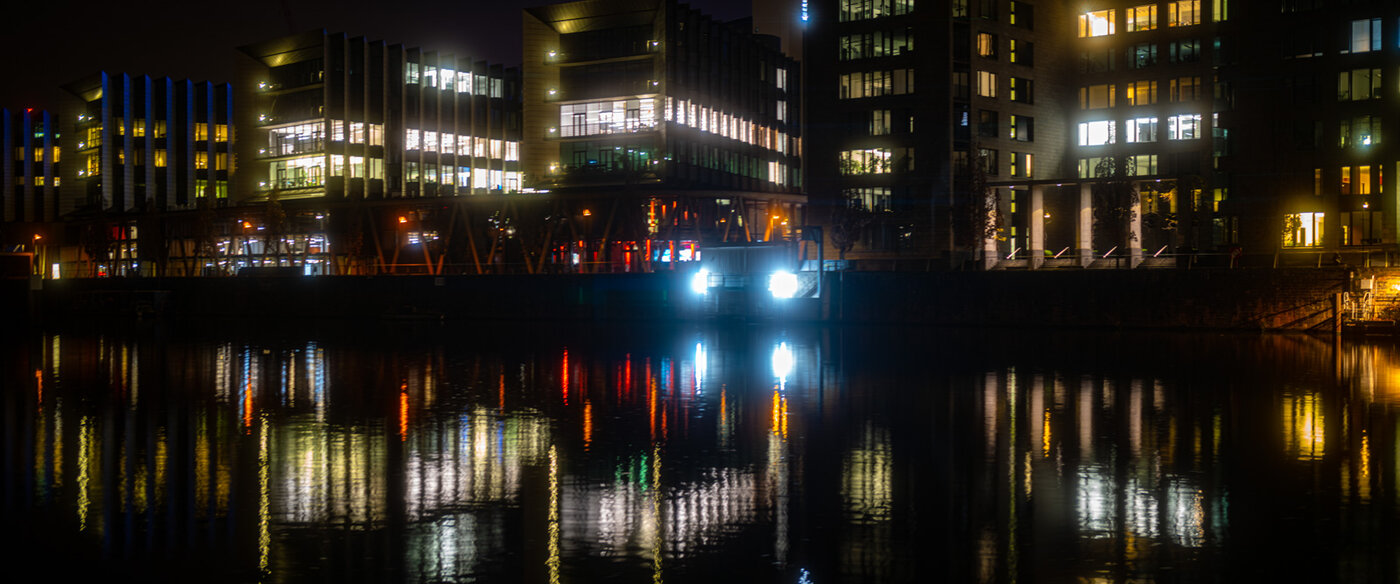
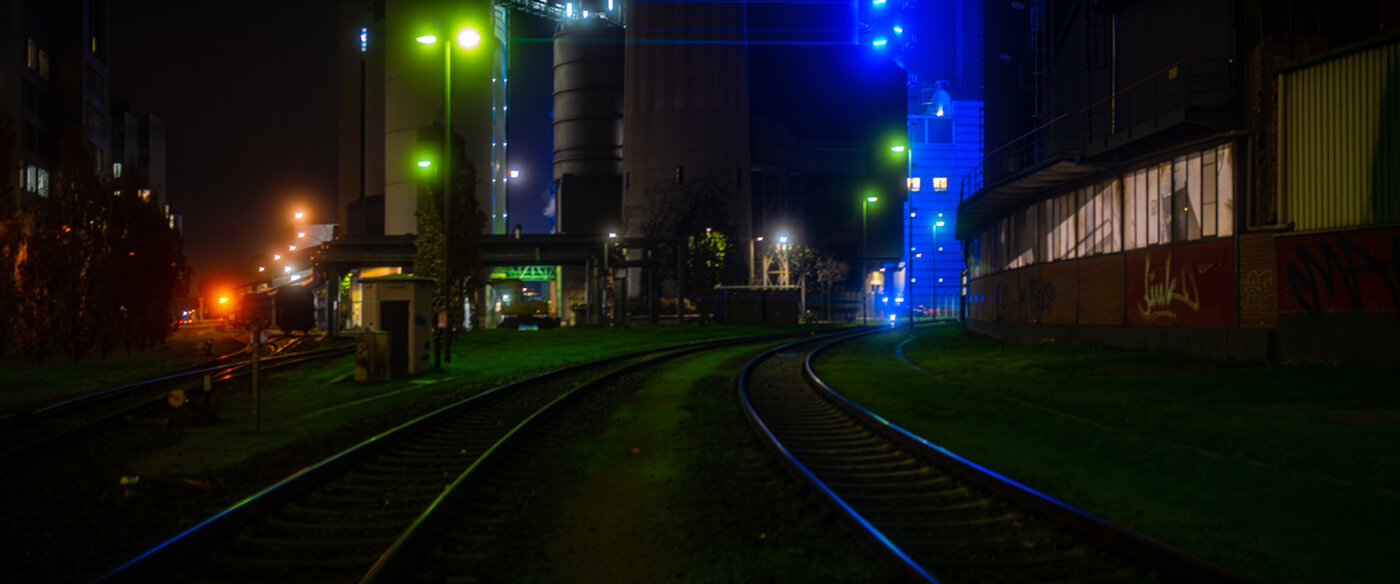
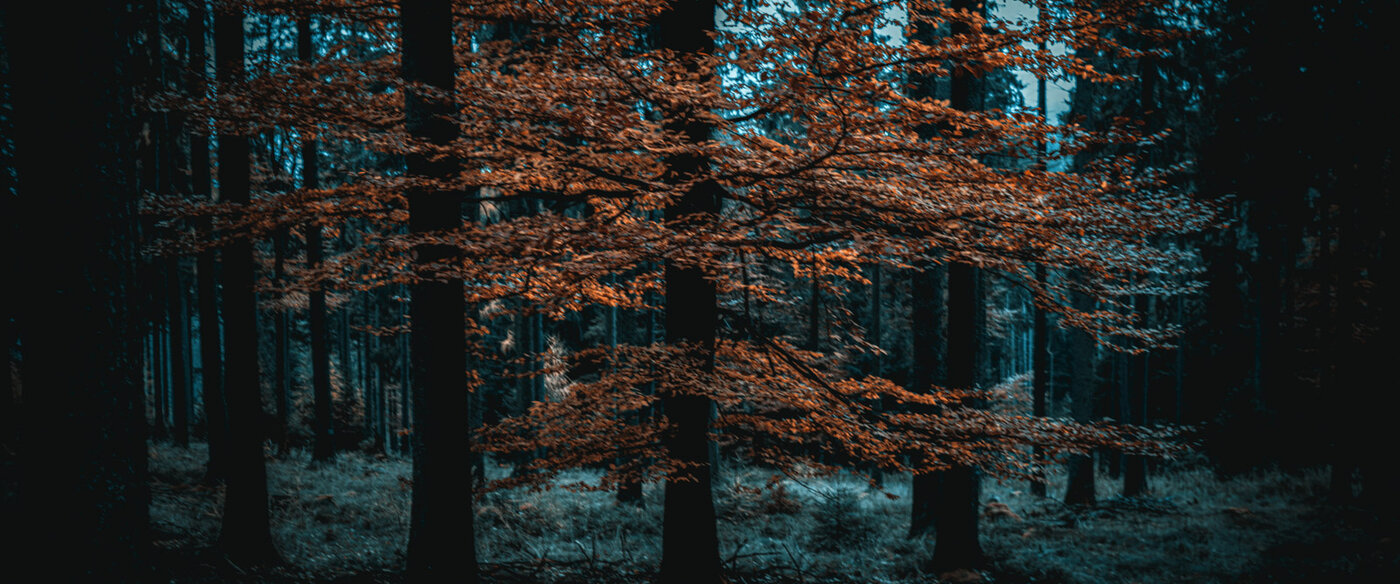
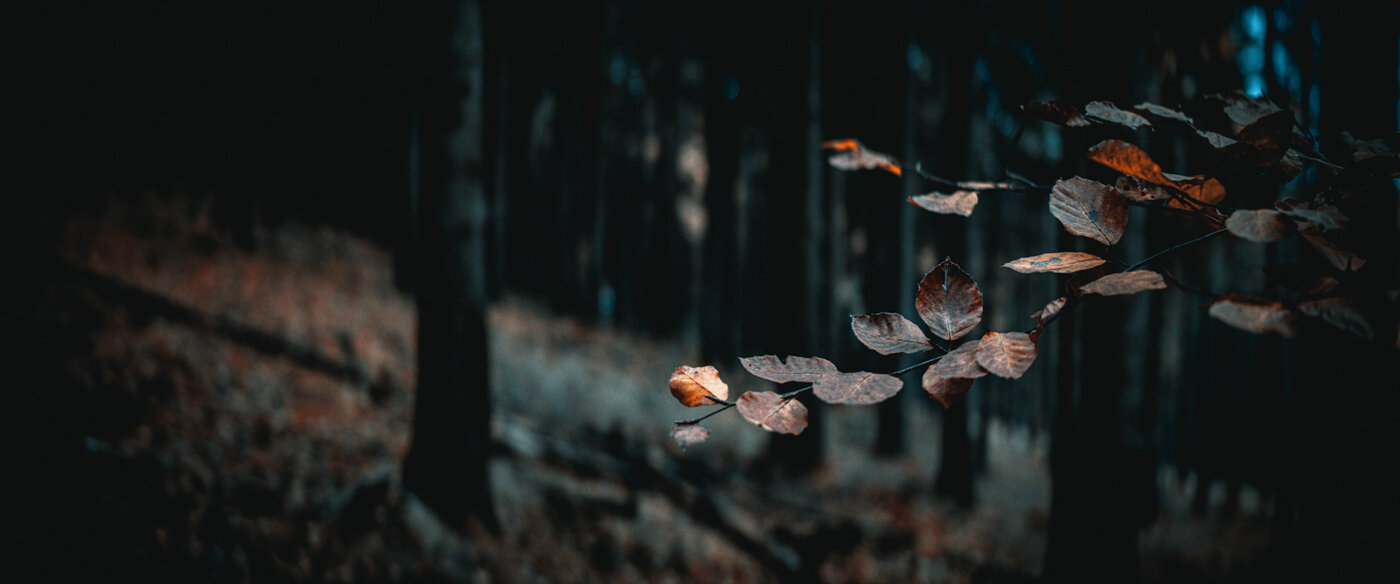
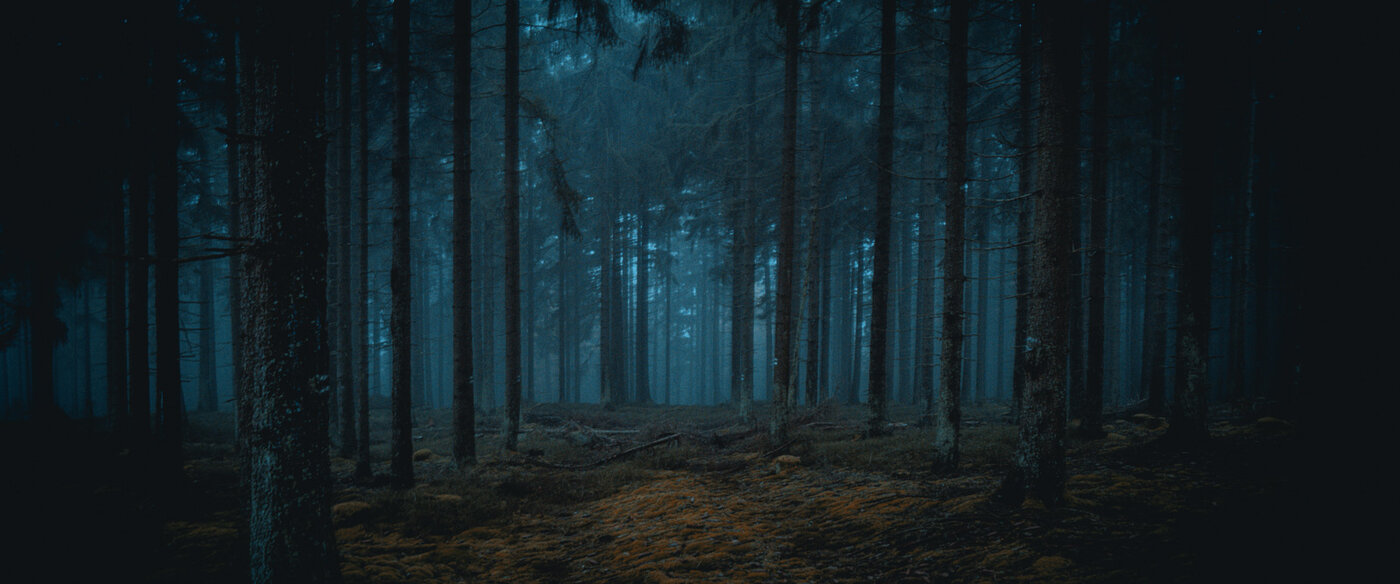
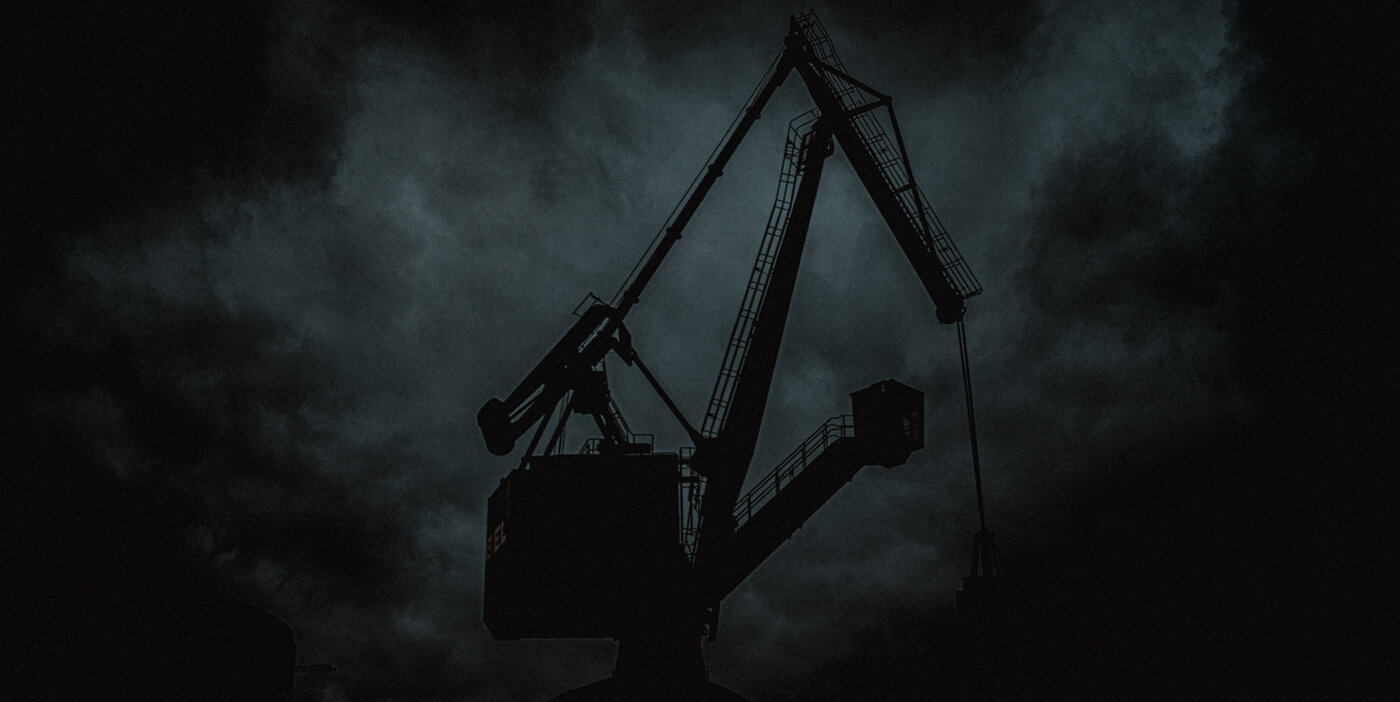
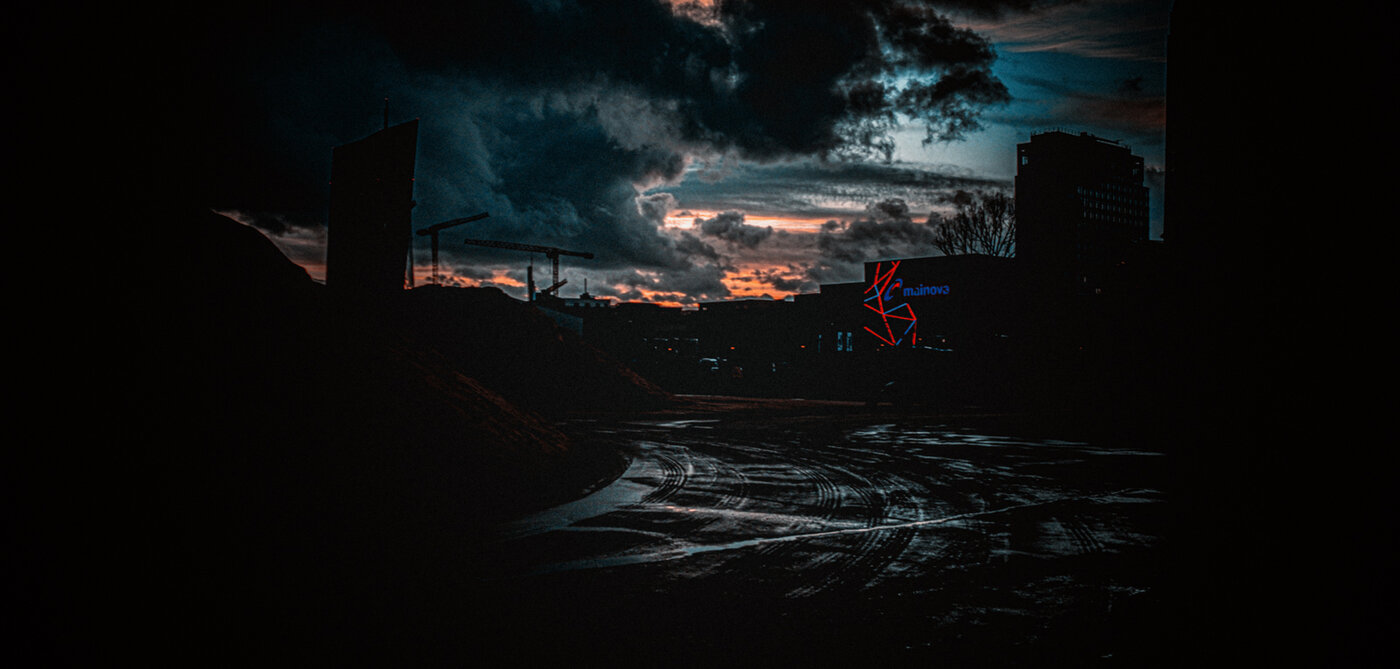
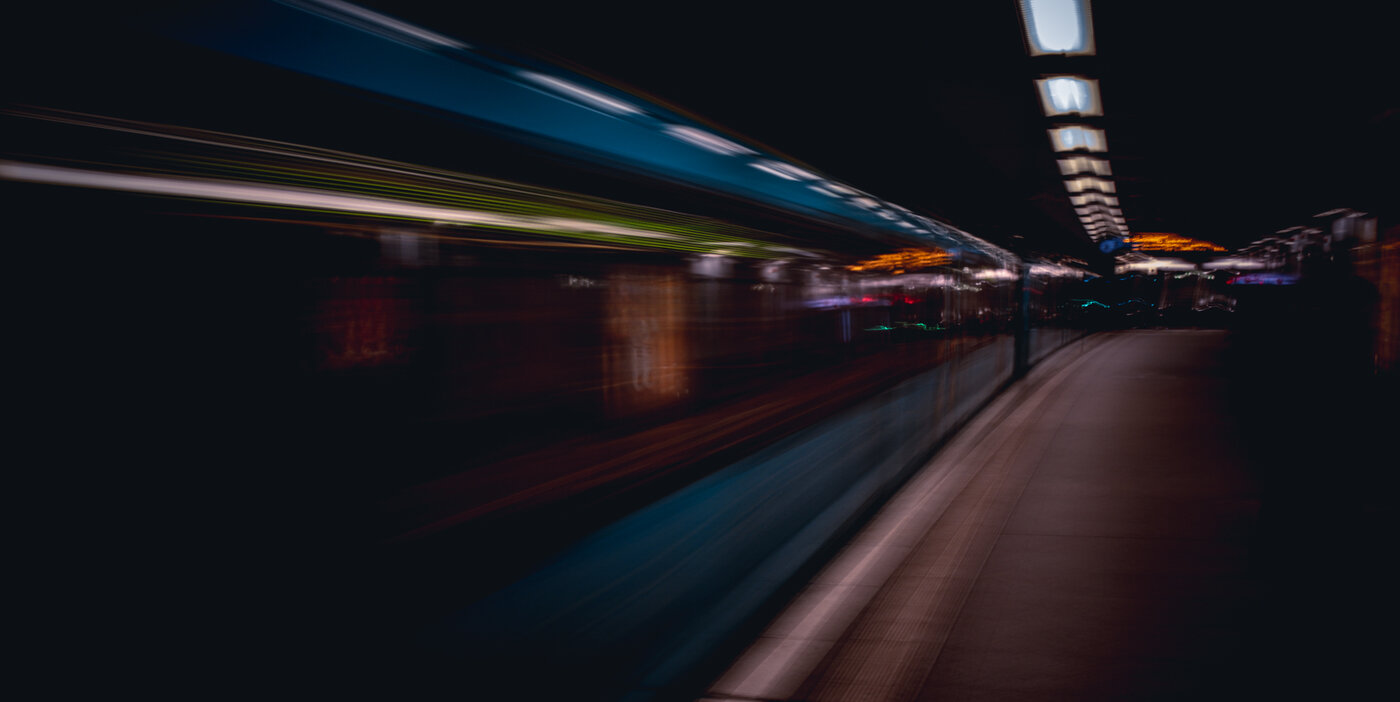
With this setup, I can cover both nature and landscape photography as well as cityscapes, which naturally offer an extra charm due to the numerous lights.
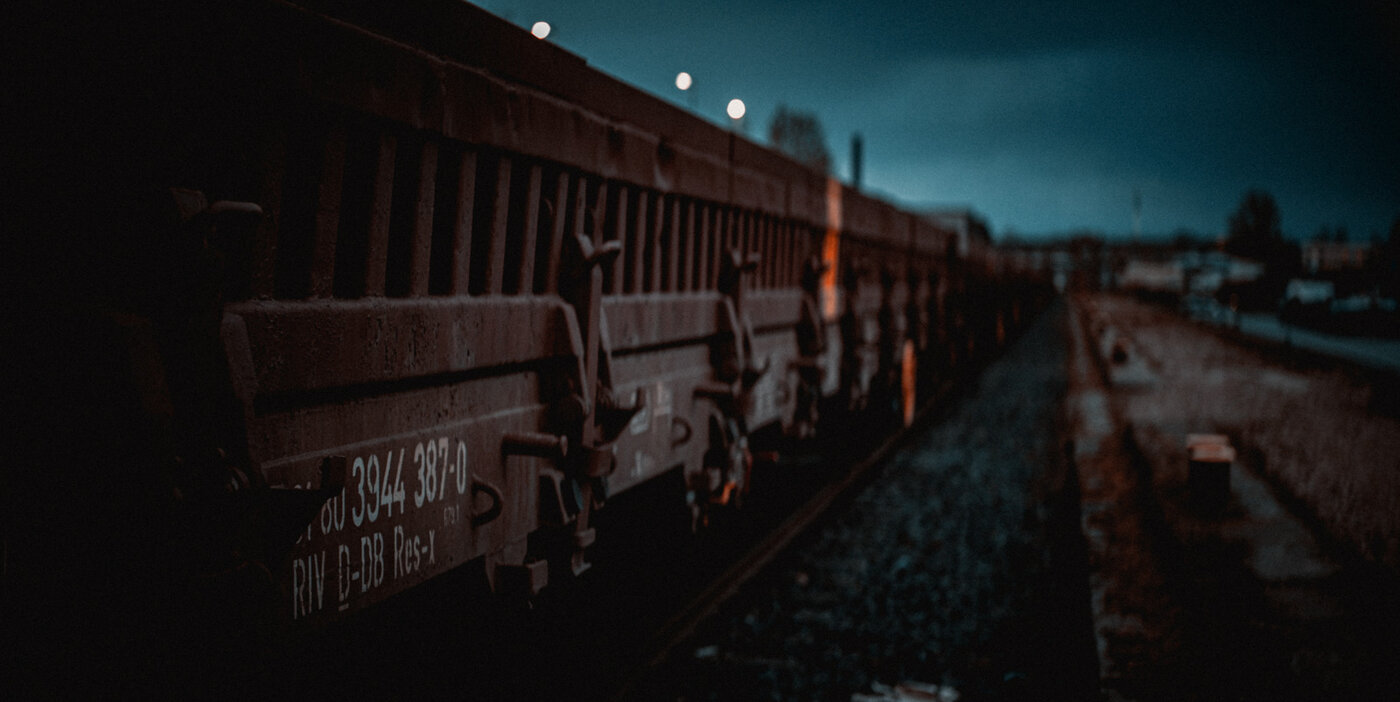
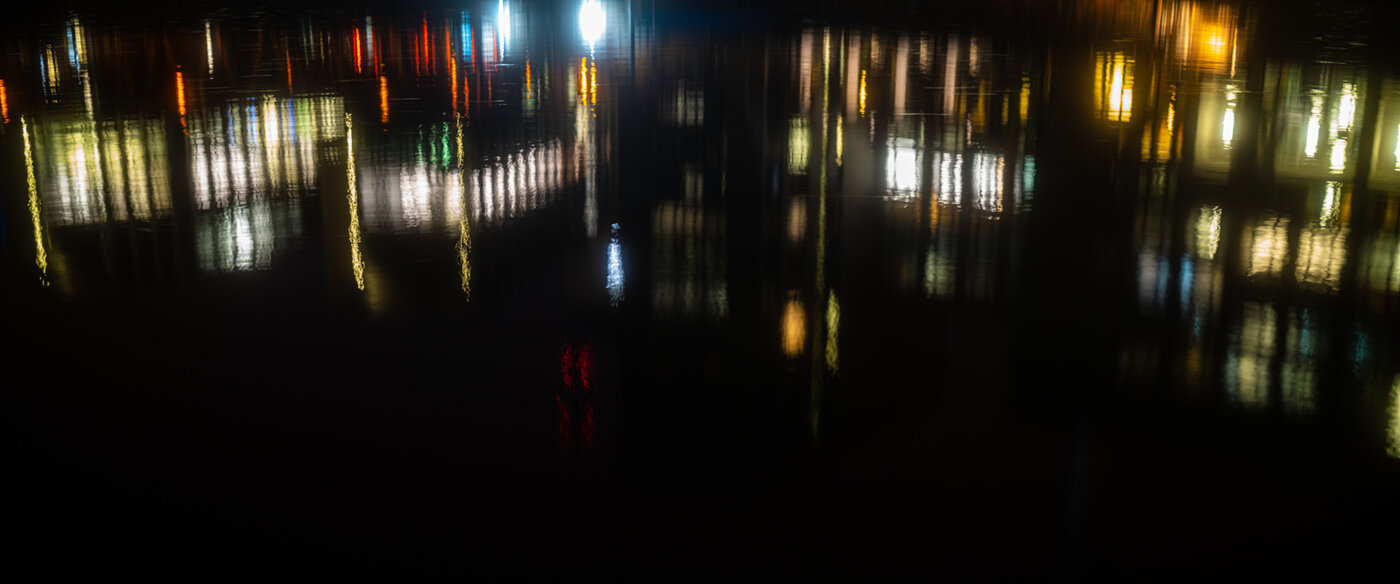
Another important aspect is that the depth of field behaves completely differently from that of a classic lens due to the different construction. The overall look tends to appear "wider." In this regard, I can only advise experimentation since, in the end, everyone must decide for themselves when this look works best for their specific subjects.
the bad part - workflow
Workflow is a crucial aspect. As mentioned earlier, all images need to be formatted correctly. While for my "regular" photographs, I import all RAW files into Adobe Lightroom, this isn't sufficient here due to the incorrect aspect ratios and the aforementioned distortions. Hence, I've developed the habit of importing images into Lightroom, performing all color corrections, and finally "de-squeezing" the images I intend to publish using Adobe Photoshop. Photoshop then saves the images as TIFFs back into the Lightroom catalog, where I make the final refinements to the TIFFs.
This workflow can be quite painstaking. While filmmakers can automate the de-squeezing of their sequences in post-production, Lightroom (and CaptureOne) doesn't support this due to its specialized nature. Unfortunately, this workaround is necessary. This might differ for other software from different manufacturers, but I've been working in this environment for many years, making it easier for me to solve the problem this way than to search for a new software package.
My dream would be to automatically de-squeeze the images as DNGs (for SL2) or RAFs (for XT4) in batches and then provide them in a Lightroom catalog for further processing.
Additionally, there are a few other "downsides" that are inherent to the lens construction and might play a role for some interested individuals:
Close-ups - I won't even touch on "macro" at this point: the close focusing distance isn't particularly impressive, typically around 0.8 meters for the 50mm. I've tried using close-up lenses and extension tubes, but the results were all unconvincing, with extension tubes being worse than close-up lenses.
The Sirui lenses tend to have a blue cast, and unless it's a sunny day in midsummer around noon, this can lead to a blue-ish tint in the images. Color correction is needed.
Vignetting and contrast are generally not issues with my subjects. I'm more interested in achieving a "velvety, sharp, yet not overly sharp" cinematic look. Also, due to the format, I usually place the main subject centrally or evenly in the frame. However, there are situations where the sometimes pronounced vignetting might be problematic, and those looking for ultra-sharp images might need to consider other lenses. In fact, I often reduce sharpness a bit using a diffusion filter in my images. To be fair, I wanted to point out these lens peculiarities.
Lastly, anamorphic lenses can be quite finicky when the camera is rotated around the lens axis. Fortunately, this is immediately noticeable through the distortions visible in the viewfinder, prompting one to voluntarily return the camera to a horizontal position.
Before virtue, the gods have placed sweat.
Or to paraphrase this quote: Before achieving the "cinematic look" in photography, sweat was poured by the gods. Of course, I don't intend to shoot every subject at all times anamorphically; the limitations of the lenses and their technical boundaries can be quite restrictive. However, in landscapes, nature, bustling cities, and industrial landscapes, there's a wealth of potential to uncover for creating stunning "cinematic shots."
sources
Unfortunately, there is limited content available on the internet specifically for photographers to delve deeper. As "still image creators," we have to resort to resources tailored for filmmakers and then adapt those learnings. Personally, I have learned an incredible amount from the inexhaustible and never-ending source of wisdom, YouTube. I would like to recommend to all those who truly wish to delve into this subject matter, the channel of Nikolas Moldenhauer's Hanseatic MediaDivision. Nik takes us into the depths of the anamorphic world through three multi-hour episodes, and without these films and the exchange with Nik, I wouldn't be where I am today.
Here is the link to the first part ("Scope Part 1") and to Nik's channel - Thank you for sharing your knowledge, Nik!
bio
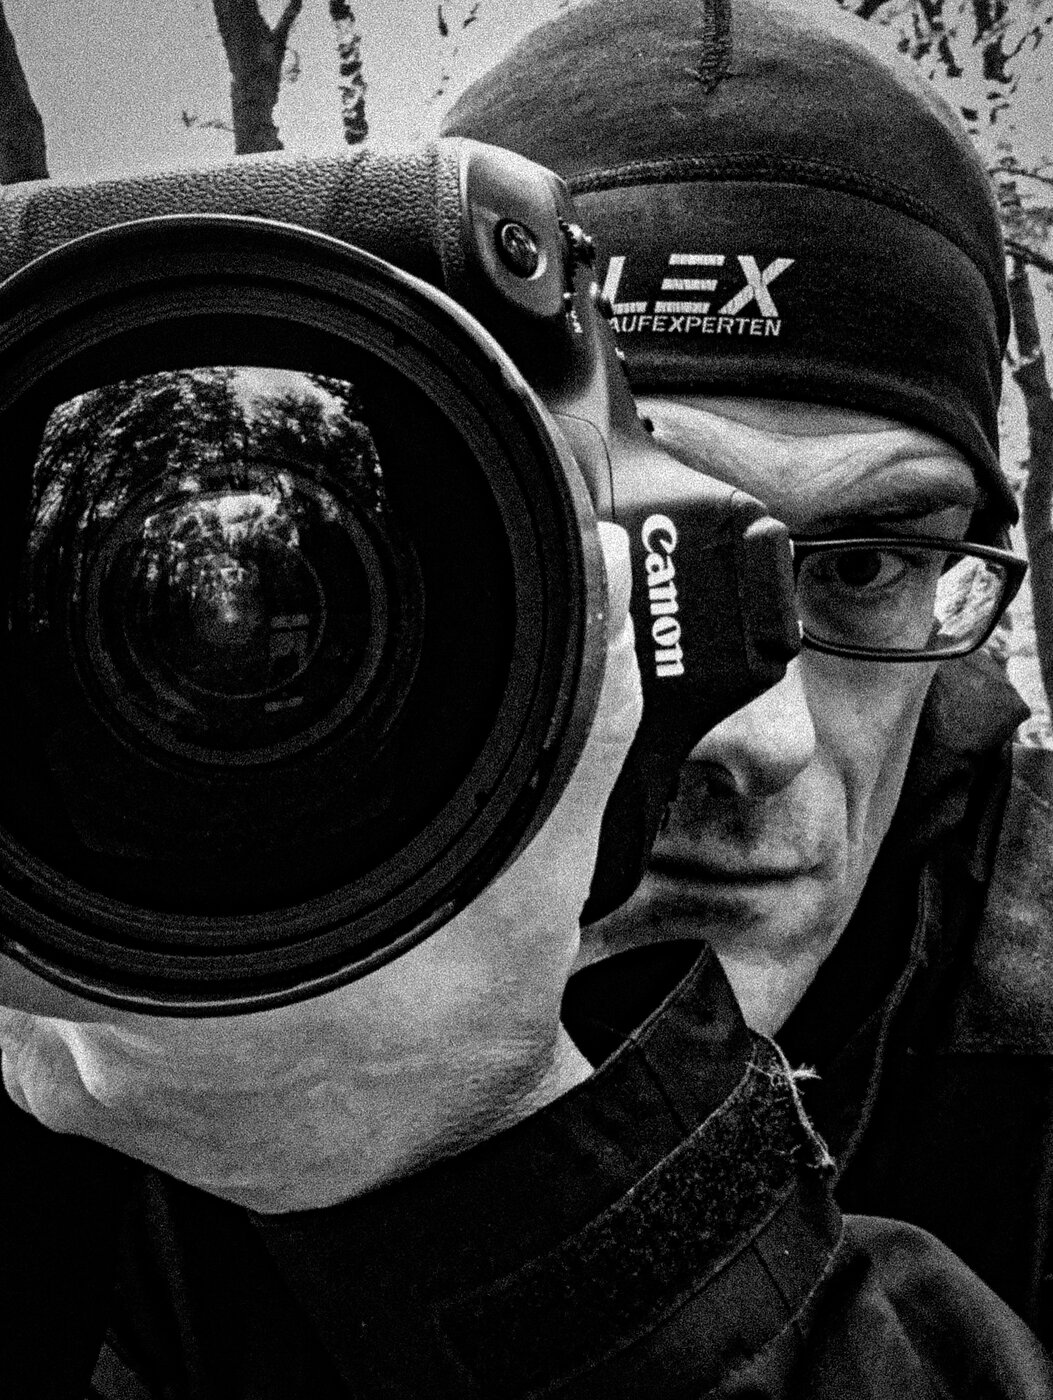
Michael Heidecker - enjoys wandering in nature and other countries, often with his son, but always with a camera in hand. He has been photographing and experimenting since he was 8 years old, both in analog and digital formats, across all sizes, in black and white and color, driven by an insatiable curiosity.